Your cart is currently empty!
When You Have to Place a Baby Feeding Tube, Part II: How to Insert a Baby NG Tube
Is your baby about to get or has she recently gotten a baby NG tube? Are you worried about how you are going to manage replacing it yourself?
I hear you, Mama. And I think I have just the advice you need right now.
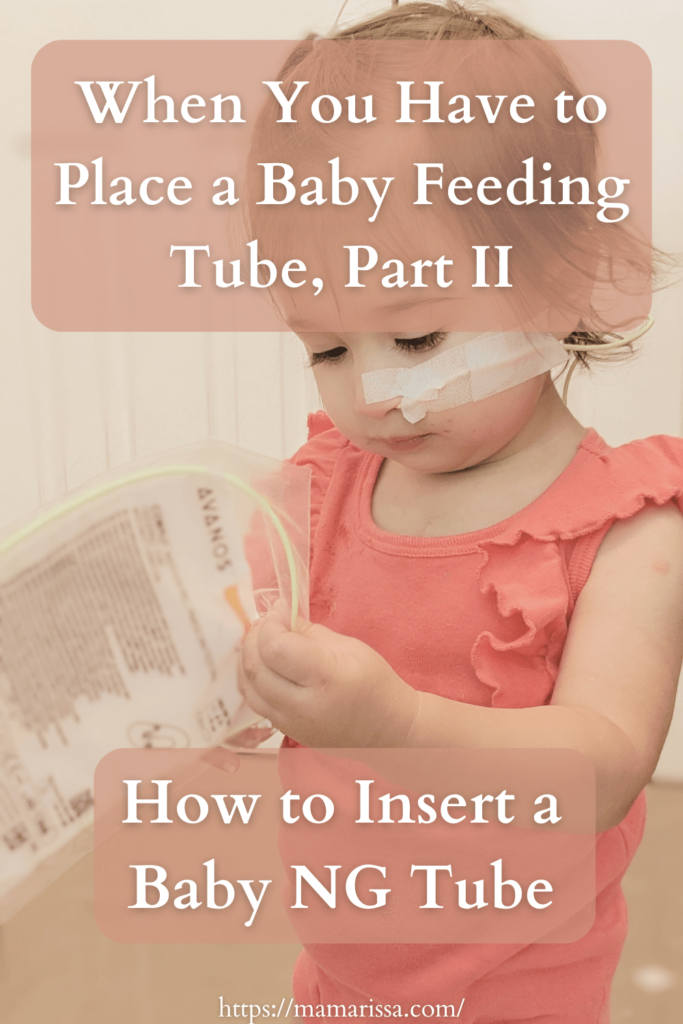
Last week I shared Part I of this series on placing a baby feeding tube. In that post, I tell the real and raw story of what it was like for me when I was first learning how to place a baby NG tube.
If you missed that post and you have apprehension about placing your own baby’s feeding tube, please go back and read that post before you continue. And then hop on back over to this post, because I am about to go over what to do and how to do it.
Before we go on, I would like to reiterate something I mentioned in last week’s post:
You do not have to place your baby’s feeding tube yourself.
If you do not feel you can or should do it, it’s okay. You can take your baby to the ER whenever she needs a tube replacement.
But if you have decided that you are willing to or need to do this yourself, I have some advice in this post that I hope will help you successfully place your baby’s NG tube. Some of the advice I have to share with you comes from a friend who first shared it with me at the beginning of our baby NG tube journey. It’s the same advice that gave me the strength to do what felt impossible at the time.
Are you ready, Mama? Let’s do this. First, you will need to gather your supplies.
Hey Mama, if you find my blog posts helpful, would you help support this blog by making purchases through product links on this page? It will not cost you any extra but the commissions I receive as an Amazon and brand affiliate help to cover the costs of operating this blog so that I can keep it running ad-free. Thank you so much for your support. You are literally the reason this blog was started and the fuel that motivates me to keep it going!
Please note that his information is meant only as the words of a mom who has experience with placing a baby NG tube for almost a year now. I am not a medical professional of any kind and this post is not meant to replace training by a medical professional. If you do not feel you have been properly trained on how to place an NG tube on your baby, please seek out that training before attempting to do it yourself.
It is very important that you have accurate information on how to do this for your child’s needs. If anything in this post differs from what you have been told by your baby’s medical team, default to what the medical team has told you to do. And if you have any concerns or questions about placing your baby’s feeding tube, please consult her medical team.
Supplies for Placing a Baby NG Tube
Before getting your baby all worked up, it is essential that you have all of your supplies ready to go. Here is what you will need:
- Adhesive removers
- Pre-cut pieces of tape
- Half-wet washcloth
- New NG tube
- Vaseline
- 5 ml Syringe
- PH Strips
- Permanent marker
- Bath towel or large blanket
Now let’s go over these supplies with a little more explanation …
- Adhesive Removers
You will need adhesive removers in order to remove the old tape from your baby’s face and back (if you tape your baby’s extra tube length to his back) from the tube that has been pulled out or broken. Depending on what brand of adhesive remover pads you have, you may need one adhesive remover pad (one package) for each piece or two of tape you need to remove.
For example, I usually put two pieces of tape on my daughter’s face and one piece on her back. So I generally use 2-3 pads of adhesive remover when I need to change her tube.
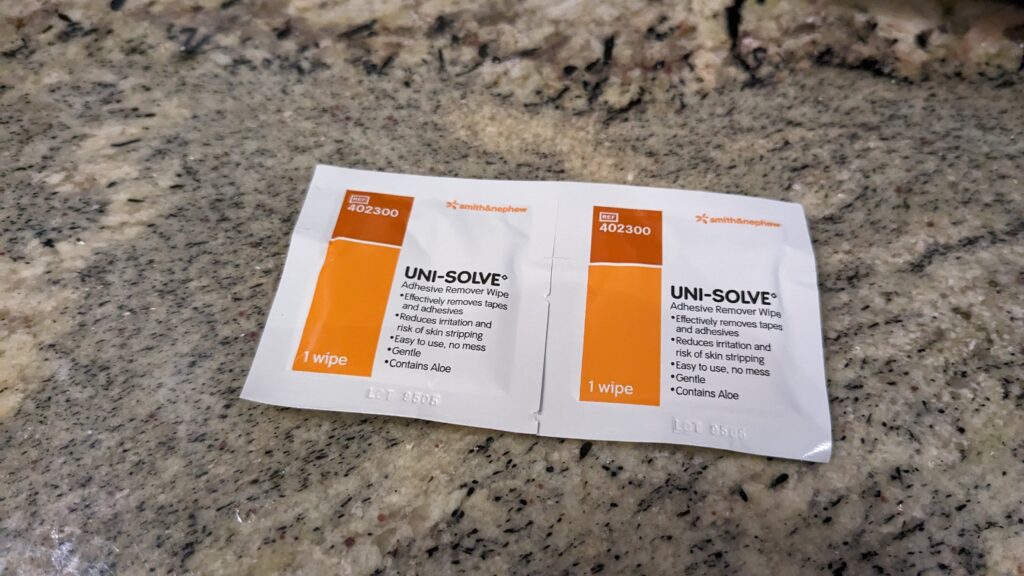
I started off buying these Uni Solve adhesive remover pads because it’s what the hospital used while my daughter was inpatient. They work excellently and I can usually get at least two pieces of tape off with one pad/package.
When I needed to reorder, I tried these Adhesive remover pads by Medline because they were half the price. But, unfortunately, I found that I often needed to use one adhesive pads for each piece of tape. So the price ended up being almost the same since I needed to use almost twice as many of these.
Additionally, they just don’t work nearly as well or as quickly as the Uni Solve brand at removing tape.
However, a more important issue has come to my attention. I was recently looking at the ingredients of each brand and checked their safety ratings on the Environmental Working Group (EWG) website. They contain some of the same ingredients and almost all of the ingredients in both are rated as a 1 on the 1-10 scale of best to worst in safety on EWG (which is a good thing).
Except for one ingredient found in the Uni Solve brand of adhesive removers: Dipropylene Glycol Methyl Ether. This ingredient has a hazard score of D on the EWG website on a scale from A to F. The top common concerns listed for this ingredient are asthma/respiratory and reproductive and developmental toxicity. EWG also notes central nervous system impairment as a moderate concern with this ingredient.
That’s concerning. Particularly since we are talking about something that is being used on an infant’s face. So I don’t think I will be using the Uni Solve adhesive removers anymore, as much as I will miss their efficiency. I will be on the lookout for other safer options, but for now, the Medline brand adhesive removers seem to be much safer than the Uni Solv based on the EWG ratings.
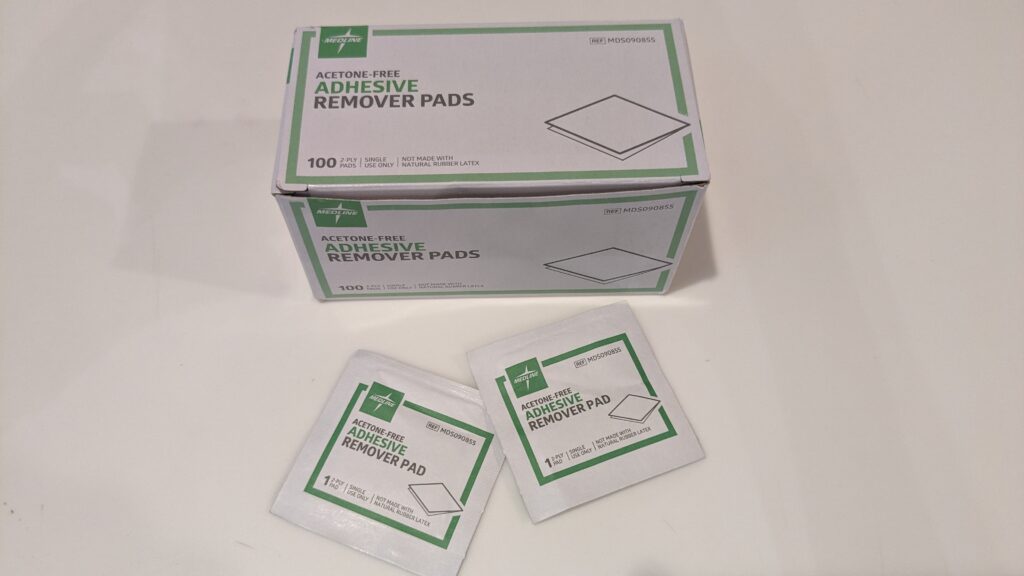
If you know of any other adhesive remover pads that are safer, please tell me about them in the comments.
As a side note, I personally would not want to attempt to use a bottle of adhesive remover because there is too much risk of it spilling when you are dealing with a wiggly, distraught baby. So I only use the individually packaged pads.
Also, please do not forgo the adhesive remover. Even though the chemicals in them may not sound like the greatest idea, trying to wet and peal off that tape is also not the greatest idea. Yes, I speak from experience.
My baby did not like the smell of the adhesive remover, so I decided to forego it. Instead, I decided to generously wet the tape and carefully peal it off. Unfortunately, this was damaging to her skin. I did not realize it at first. I thought she might be having a reaction to the tape as some babies do, because it did not seem to be hurting her when I was working the tape off.
But I eventually figured out the redness and irritation were from pealing the tape off without adhesive remover. When I use the adhesive remover, she has no problems. Although, please also be aware that some baby’s delicate skin may actually have a reaction to the adhesive removers themselves. In which case you would need to find one that does not cause a reaction.
But whatever you end up with, you will want to lay out at least 2 adhesive remover pads – unopened – with your supplies while preparing for a tube change. Once you open them, they can get messy and dry out. It’s best to open them right when you need them.
Insurance Note: My DME (durable medical equipment) company does not send adhesive remover with my daughter’s supplies. You can ask if your baby’s DME company has adhesive removers available to send, but keep in mind that even if they can send you adhesive remover, it may not be covered by insurance.
- Pre-Cut Pieces of Tape
The next thing you will need to have prepared is the tape. In the hospital, they usually just put a single 1-inch-wide piece of tape on my baby’s cheek to hold the tube in place. But that wasn’t good enough for me. I want that tube to STAY IN, so I add an extra piece for extra security.
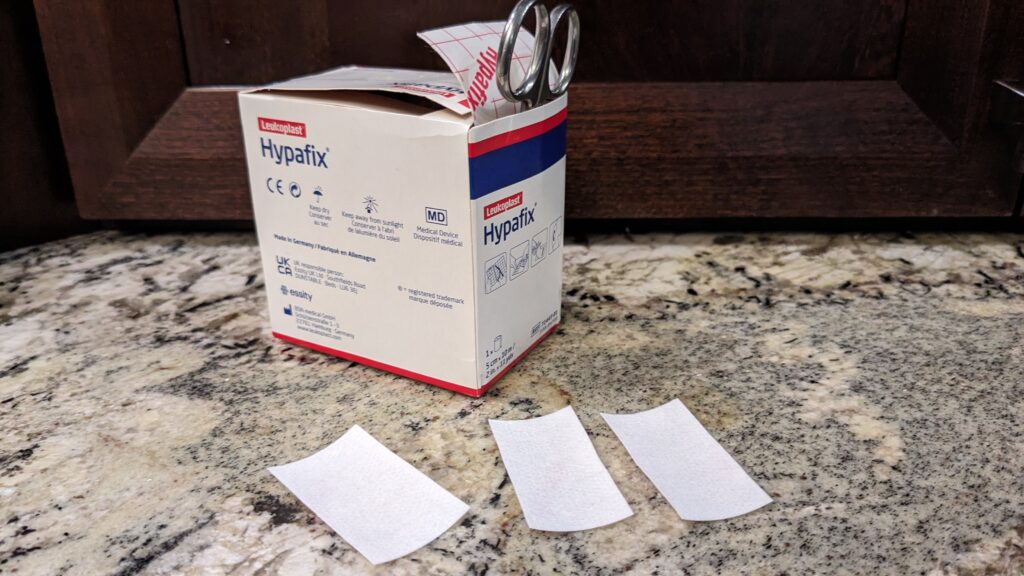
So what I do is cut 2 pieces of inch-wide tape and layer them so that they cover all of the tube that runs along her cheek, limiting opportunities for it to get pulled out.
I also cut a third piece of tape, slightly wider than the face tape, for taping the tube in place on her upper back. This is an added security to prevent the tube from getting pulled out. It also helps to keep the tube from getting tangled around body parts.
Read my tips and tricks for life with an NG tube baby.
I like to take the backs off of the face tape pieces while I am laying out supplies and tape them to the side of the cabinet, edge of the bathtub or whatever hard surface I’m near. This makes it much easier to put the tape on instead of trying to mess with getting the backs off while holding the tube in place on an unhappy baby.
Insurance Note: Your DME company should be able to send tape along with the other supplies if you want them to. But check to see what kinds of tape they are sending and what you actually need. We were a few months into receiving our supplies when I realized our DME company was sending a special type of tape for sensitive skin which was not covered by insurance and which my daughter did not need. It was a small expense, but unnecessary just the same.
Pro Tip: If your baby is ever inpatient in the hospital, take home whatever supplies are brought to your baby’s room. Ask the nurses if you are unsure if you can take something, but most things that will otherwise need to be thrown away can be taken home (example: diapers, wipes, baby wash, socks and TAPE). I have multiple boxes of tape and multiple pairs of little scissors from my daughter’s multiple stays in the hospital. I have never had to buy or request tube tape from our DME in 11 months of tube feeding.
- Half-Wet Washcloth
Yes, you actually need to have half of the washcloth wet and half of it dry. Unless you want to have one wet washcloth and one dry washcloth. Which is fine too. But either way, you will want to have a wet washcloth for cleaning the adhesive remover off of your baby’s face and a dry washcloth for drying her face before putting new tape on.
The dry washcloth is more applicable to tape changes that do not require a new tube placement when you are putting new tape on right after removing old tape. If you are changing the tube, just wipe her face with a wet washcloth after removing the old tape. By the time you get the new tube in and put fresh tape on, her skin will be dry on it’s own.
I love Norwex baby washcloths for this because they softly scrub and clean better. But any gentle washcloth will do.
- New NG Tube
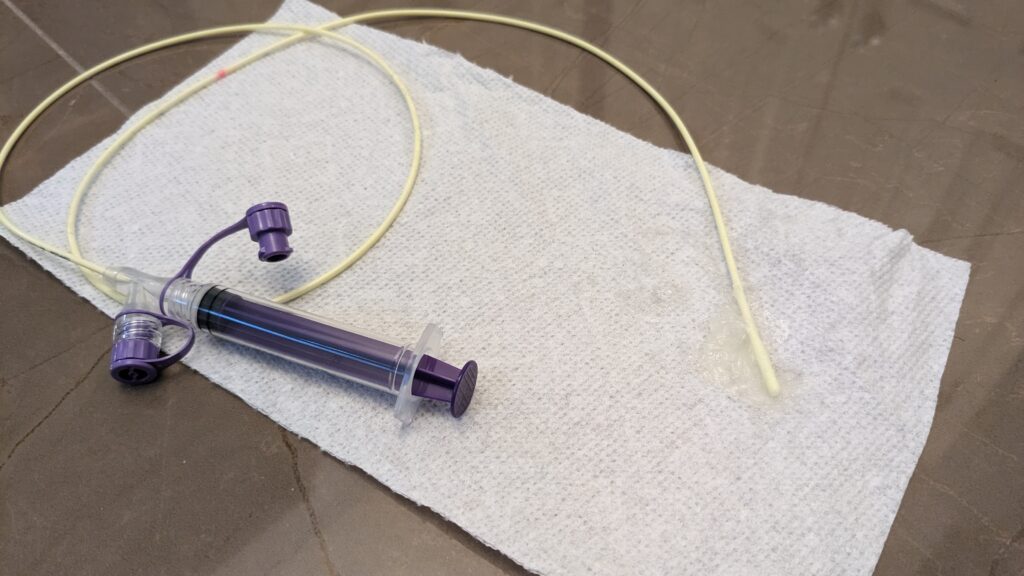
When you are changing a baby NG tube, you will, of course, need to have a new NG tube ready to go. Remove the tube from its packaging and lay it on a paper towel. Close one of the ports – whichever one you will not be using for feeds.
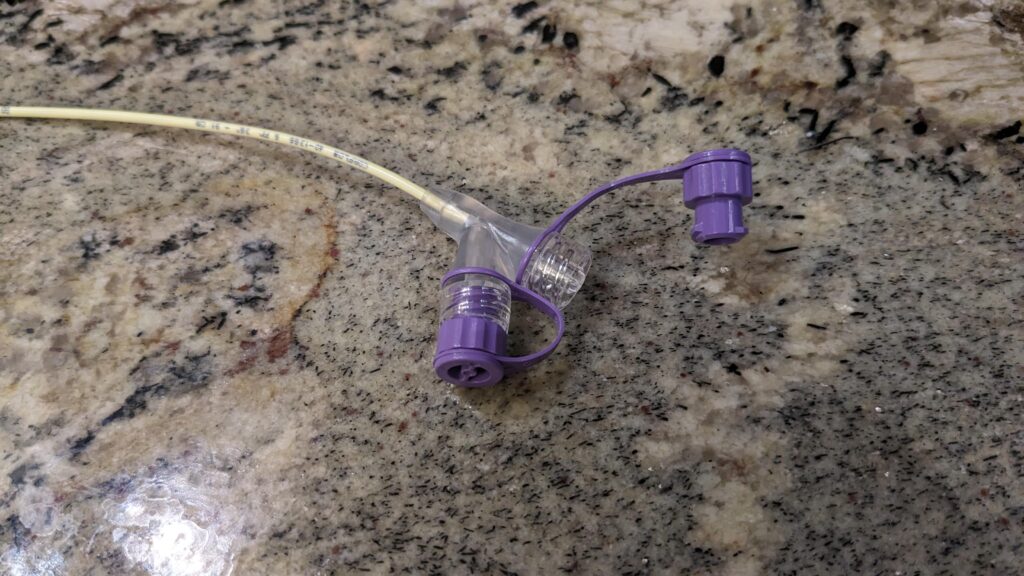
I also need to mention here that you should not discard the old baby NG tube that has been pulled out or broken. Keep it on hand until you are done putting in the new tube. We’ll come back to the reason for this later.
Pro Tip: If you are not happy with the length of your baby’s NG tubes, request that the DME company send a different length. My baby’s DME company was sending us short tubes for a while and I didn’t realize it until I ran out of the 91 cm tubes. Then I had to put in a short tube and it caused a big problem for us during night feeds when it would get kinked up by her neck.
My friend told me to ask them to overnight some 91 cm tubes, so that’s what I did. Tube feeds went so much smoother once we were back to the longer tubes! However, some tubie mamas have told me they actually prefer the shorter tubes. So whichever you prefer, just know that you can request that length from the DME company if necessary.
- Vaseline
You are going to need some Vaseline as a lubricant for pushing the tube through your baby’s nasal passage. Put a dab on one end of the paper towel you have for the new tube. But don’t put the end of the tube in it just yet.
- 5 ml Syringe
You will need a syringe for checking placement of the tube once you’ve inserted it. Grab a 5 ml syringe and screw it onto the open port on the tube. It helps to have the syringe already screwed on and ready to check placement before putting the tape on.
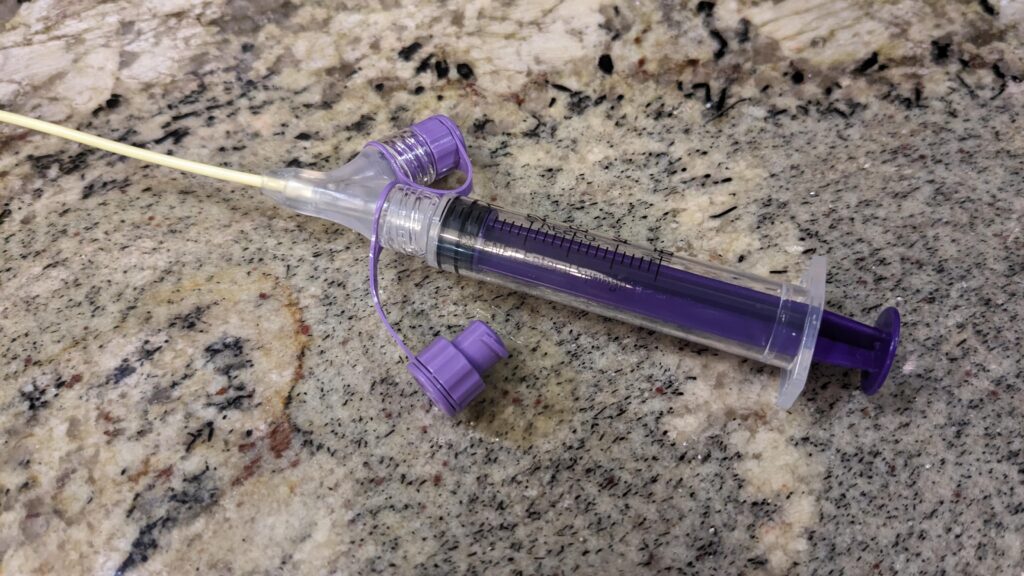
Pro Tip: If your baby is inpatient, once again, you can get syringes from the hospital. Ask the nurse if they can bag some up for you to take home. I asked for some syringes while we were inpatient and they brought me several bags packed full of different sized syringes! I was almost as happy as if they had brought me bags of assorted cookies.
Also, your DME company should at least send 5 ml syringes with your monthly supplies. But double check what they want to send you. My baby’s DME company kept sending us 60 ml syringes that we had no use for. When I asked them to stop sending those, they offered to send additional 5 ml syringes in their place. Which was great since I used the 5 ml syringes the most at the time.
- PH Strips
PH strips are for testing the liquid you get when you pull back on the syringe to check for correct placement of the tube. Essentially, the correct PH tells you that the tube is indeed placed in the stomach where it should be.
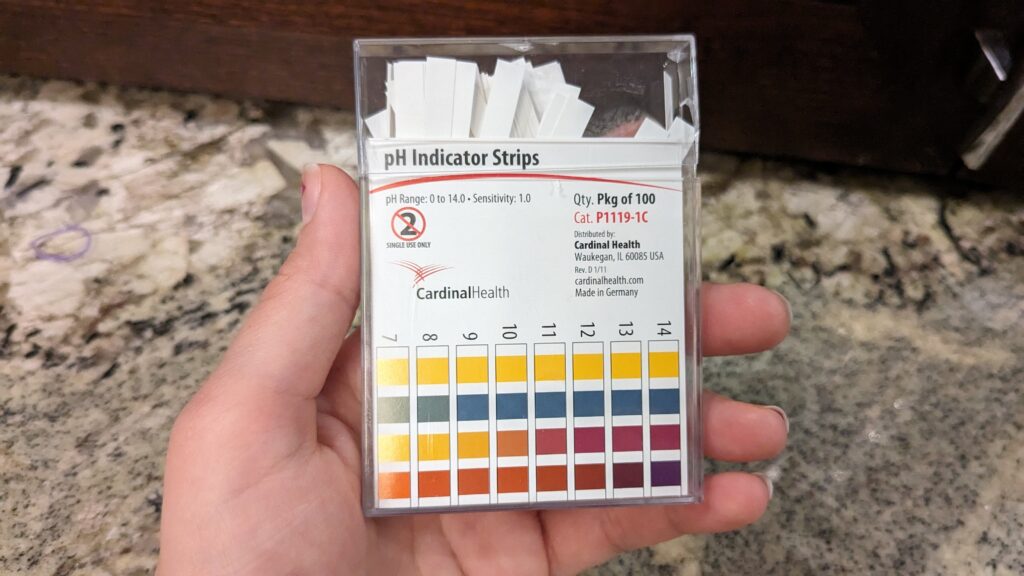
To be honest, I have never used these because the nurses did not use them when my baby was inpatient. But they probably should have been using them.
Read how to prepare for your baby’s open heart surgery.
I have some Cardinal Health PH test strips like these ones in my cabinet that the hospital gave me, but I was never shown how to use them. Nor did I ever see anyone else use them during my training or during any of my baby’s hospital stays. However, for the sake of safety as well as peace of mind, I recommend that you use them.
- Permanent Marker
You will need a permanent Sharpie marker for marking how far in to insert the infant feeding tube after you measure. Make sure you mark all the way around the circumference of the tube so that you will be able to see it even if the tube twists.
- Bath Towel or Large Blanket
And lastly, you will need a bath towel or large blanket for swaddling your baby. Lay the towel or blanket on the floor – either on carpet or on a rug – with all of your other supplies within reach.
And that is all you need! Now that you have everything ready to go, let’s walk through what to do.
As a reminder, I am not a medical professional and these steps should only be taken as my experience as a tubie mom. Please refer to your baby’s doctor and/or nurse regarding how to place an infant feeding tube.
If anything in this post differs from what you have been told by your baby’s medical team, default to what the medical team has instructed you to do and ask them any questions you have. The purpose of this post is not to train you on how to insert an NG tube but to help you feel more at ease doing so.
Inserting the Baby NG Tube
I am going to walk you through this in a series of steps with some tips along the way. To get a simplified version of both the supply list and the following steps, enter your email address at the bottom of this page and you will get free access to my “Cheat Sheet for Placing a Baby NG Tube” printable.

Now, as you prepare and begin to insert a baby NG tube, I want you to remember something I told myself at the beginning – something I also frequently tell my 6-year-old:
You can be scared and still do the thing you are scared to do.
That’s called courage, by the way.
And remember, if it’s really not going well and you don’t feel safe about it, you can always take your baby to the ER to have your tube placement checked or to have a nurse replace it for you.
Take a deep breath, Mama. Stay laser focused on the task at hand. Your baby is going to scream. And you might not be able to comfort her in the moment. But you will give her all the love when it’s over.
While I am in the process of changing my daughter’s tube, I can’t allow myself to empathize with her. Partly because it might break my ability to do it. And partly because I have to focus on doing it correctly. I have to shut everything out except the task I have to do that is necessary for her nutrition and health.
But when it’s over, I give her cuddles and kisses, I give her a piece of tape to play with (which she loves), I let her nurse, I tell her what a good girl she is. She knows it’s over and she knows I love her. And she’s back to her happy self soon after.
I have a piece of advice to insert here that came from my friend – the one who gave me the courage to change my daughter’s tube myself. Her daughter has more medical needs than my baby. She’s been through so much. And this is the gist of what she said to me about all the medical procedures her daughter has been through:
You have to approach these kinds of things like it’s no big deal, confident that everything is fine. You just have to act like getting poked ten times a day is totally normal. Show your child that you know it’s all going to be okay. Limit the drama so that they feel more grounded.
This really helped me. After she told me this, I changed my own behavior with my daughter when changing her baby NG tube. Instead of saying, “Oh, poor baby, I’m so sorry I have to do this to you”, I began to say things like, “I know this isn’t fun, but it’s going to be okay, Baby. It will be over soon.”
Even though it feels horrible inside as her mom to have to put her through this, I have to act like it’s normal. I have to do whatever I can to decrease her anxiety. Even if she’s still going to scream and hate it, at least she’ll know that I am steady for her – even if I don’t feel steady inside.
Okay, Mama. It’s time to go through this, step by step. Are you ready?
Here we go …
1. Remove Old Tape
Before you start messing with your baby more invasively, get the tape off of her back with one of the adhesive remover pads. Then, swaddle her to get the face tape off so that you do not accidentally get adhesive remover in her eyes when she squirms.

My baby did not like the smell of the adhesive remover, so she would cry even while I was just removing the tape. I knew she was not in any pain, because the tape was easily sliding off with the use of the adhesive remover. By contrast, she would not cry when I tried to remove the tape with only water, even though it clearly irritated her skin.
But regardless of whether or not your baby minds the smell, he likely will not enjoy having his face and tube area messed with. He will be trying to turn away from you and push your hands away the best he can. It will be so much easier to keep him safe if he is swaddled.
If your baby’s old tube is broken on the end but the tube is still inserted, go ahead and pull the tube out once the tape is all off. Set the old tube aside near your other supplies – remember, you need to save it for now.
Once you’ve removed the face tape and tube, wipe his cheek clean with the wet half of the washcloth. Now you need to unswaddle him. Pick him up and give him some comfort before continuing on if he is upset.
Also, wash your hands after using adhesive remover and also after handling the old baby NG tube. Although NG tubes are not sterilized, you should make sure your hands are clean any time you will be handling a new tube.
Read why my baby has holes in her heart.
Pro Tip: If your baby’s NG tube breaks on the end where the port is, gastric contents will start leaking from it, especially if she is crying or exerting herself. In order to stop the tube from leaking until you can remove it, fold and clamp the end of the tube with a chip clip or simply tie it in a knot. My husband gets the credit for this idea. He was actually the one who rushed to the rescue with a chip clip the first time my daughter’s tube broke when she became more mobile and it would get wrapped around things.
2. Undress Your Baby
If you haven’t already,, you need to undress your baby before you move on to the next steps so that you can properly measure the tube. You can leave a diaper and pants on, but the entire torso needs to be exposed.

3. Measure the Tube
Hold the tip of the rubbery non-port end of the tube to your baby’s nostril as you pull the length back to the lobe of the ear. Release the tip that is at the nostril to hold the measurement to the earlobe. Pull the length of the tube down the chest and to the belly.
Place two fingers right above the belly button. Right above your two fingers is where you need to mark the tube with a Sharpie marker. But it is beneficial to measure at least one more time before marking the tube. Just note the length in the centimeters printed on the tube to compare with the next measurement. Or make a small mark with the Sharpie for comparison.
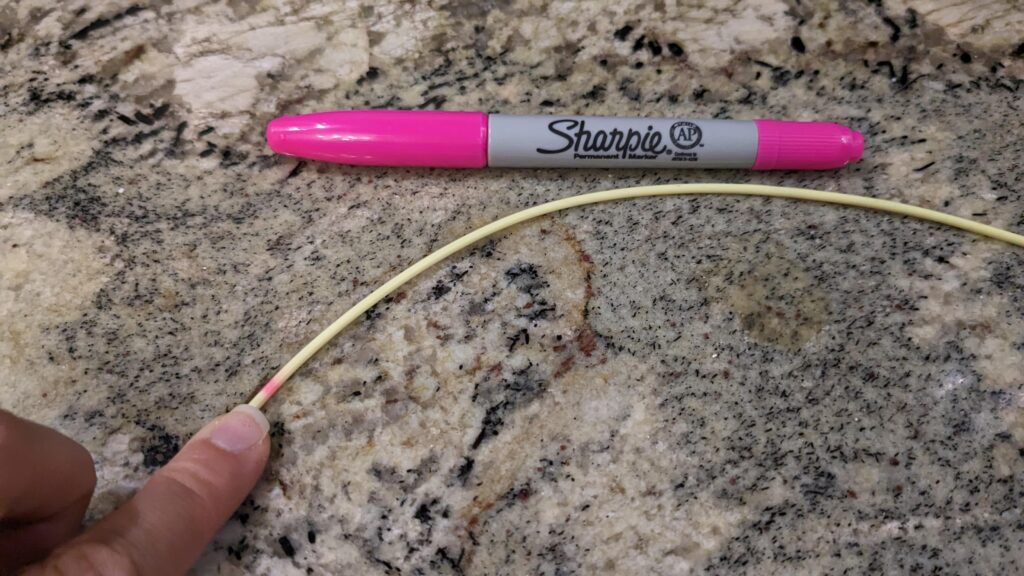
Depending on your finger size, the measuring method can vary a bit. I have fairly small fingers, so the nurse teaching me told me to measure about two and a half finger widths above the belly button. If you have larger fingers, you might want to do slightly less than two finger widths.
And now is when you will need that old NG tube I told you to save earlier. The reason is that it is helpful to compare your new tube measurement with the measurement on the old tube. Keep in mind that your baby will grow, so don’t assume that the old measurement is still accurate. However, if your new measurement is way off from the old one, you need to remeasure.
Make sure you mark all around the circumference of the tube with the marker for your final measurement.
4. Dip the Tube in Vaseline
Dip the rubbery non-port end of the tube in Vaseline, just enough to coat it. Lay the tube on the paper towel.
5. Swaddle Your Baby
Now it’s time to swaddle your baby again. You don’t need to be good at doing fancy swaddles for this. Just lay one arm by her side and wrap the same side of the towel around her torso, tucking it beneath her back under her opposite arm. Then lay her other arm down by her side and wrap the other side of the towel around her and tuck it under her back.
6. Position Your Baby
Once your baby is swaddled, put your hand under her and angle her up a bit so that she is in a reclined position. Support her neck and tip her head slightly back (not too much). See the picture below of a nurse positioning a manikin baby while inserting a baby NG tube.
7. Insert the Tube
With one hand supporting under your baby’s neck, use the other hand to pick up the non-port end of the new tube. Aiming for whichever nostril you measured from, gently insert the tip of the tube and guide it inside, continuing to feed it in. Keep going, going, going until the mark on the tube is just outside the nostril.
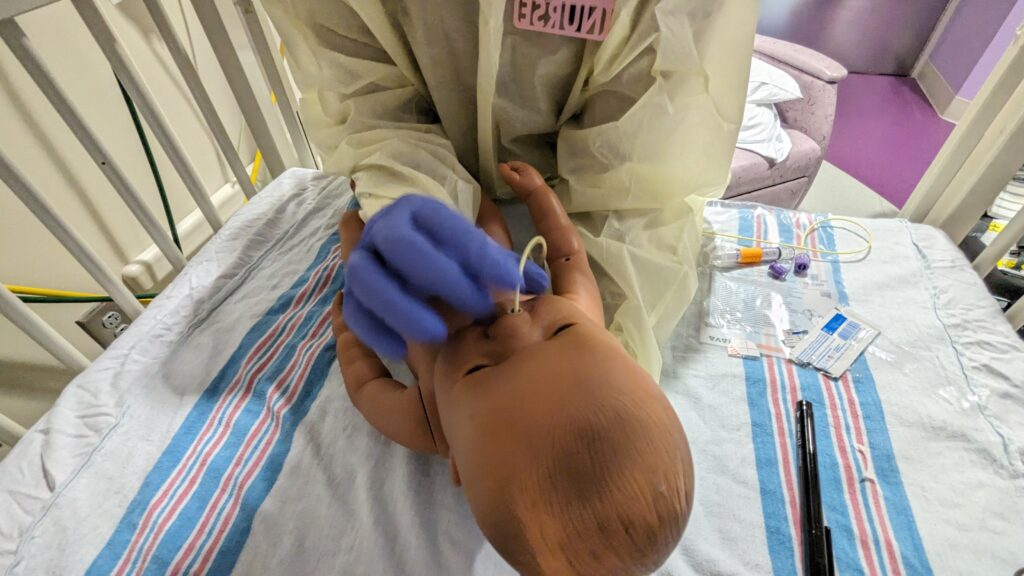
It will feel like a lot of tube is going into your baby’s little body and she will be crying – screaming even. But as long as you still see the mark on the tube too far out, keep gently pushing it in.
I have a few tips here that I learned from my friend as well as my own experience:
- If the tube seems to get stuck in the nose, try pulling a little bit out and pushing back in. You can try this a few times. If it still is not going in, try the other nostril. My friend said she realized that getting the tube through the nose is like getting it to go in a hook shape. Once you get past that hook, it’s easier.
- If the tube is hard to push further in at any point, do not force it but do not pull it out. It is most likely meeting with resistance due to the force of your baby’s crying. Just blow in your baby’s face to get her to stop crying and swallow and then continue. You may have to blow in her face several times to get the tube all the way in.
- The faster you can insert the tube, the faster your baby will be out of an uncomfortable situation. However, it is okay if you cannot insert it quickly. If you have to stop because of resistance, do not fear that you have to pull it out just because it wasn’t one smooth glide to get the tube in. Just pause briefly as needed and then keep going.
8. Check Tube Placement
Once the tube is successfully all the way in, gently lay your baby flat on the floor and hold the tube to his face with one hand. Pick up the syringe attached to the tube port and pull back to check placement. If you get gastric contents, check the PH level with the PH strips to ensure the tube is placed correctly. If the PH is correct, you are good to go and can move on to taping.
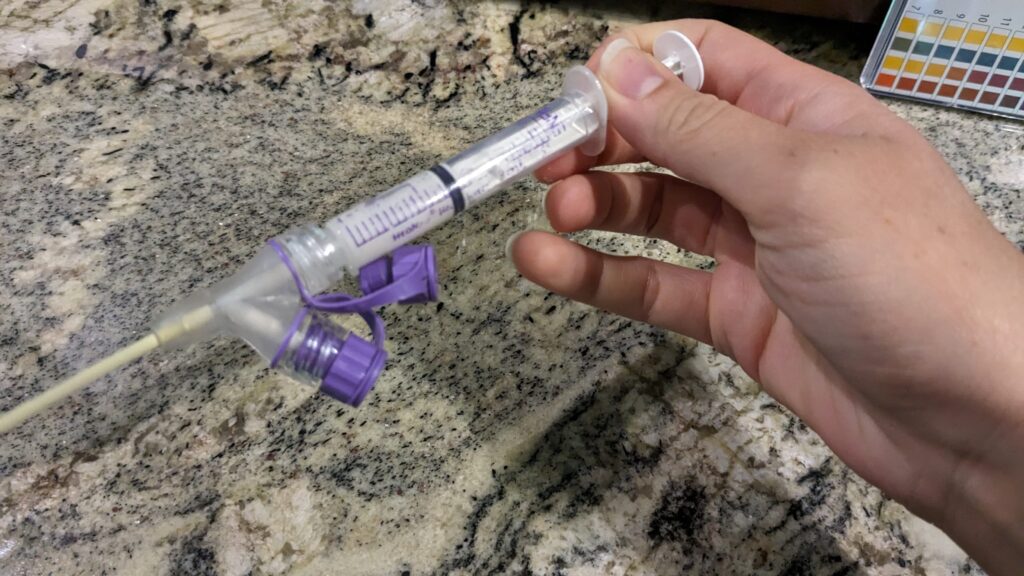
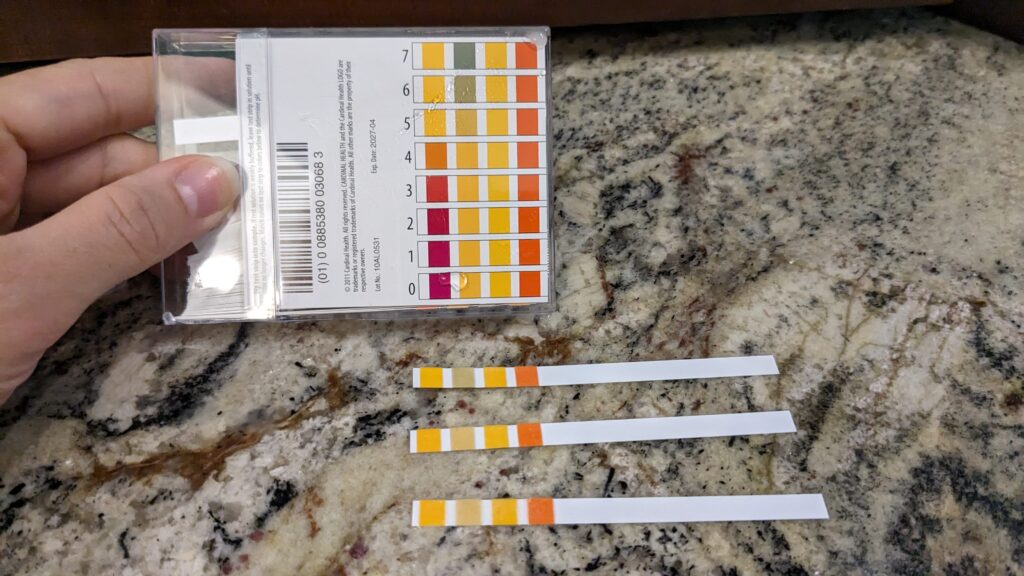
Since I do not really have experience with this, I will direct you to this pamphlet from Intermountain Healthcare for instructions on how to use PH strips. The pamphlet states that the PH level of gastric contents should be 5 or less. It also states that the child must have been fasting for a few hours for the test to be accurate. Otherwise, if you are testing mostly fresh milk, the PH will not match that of stomach acid.
I did do a few PH tests from my daughter’s gastric contents for the sake of this post. I tried it several times with varying lengths of “fasting” (sometimes she had had a few bites of food but no liquid feeds for a half hour, 2 hours or 4 hours) and got basically the same result each time. As you can see from the picture below, the PH I have gotten is between 5 and 6. The bottom strip is unused for reference.
As always, I recommend you ask someone from your baby’s medical team to show you how to use PH strips and what the best method of checking baby NG tube placement is. When I stayed with my daughter in the hospital, I was told to simply check to make sure I could get gastric contents by pulling back on the syringe.
This may have been a blunder on the part of the medical staff. But the reality is, you will not always be able to ensure that your baby has an empty tummy when you need to check placement of a new tube. So PH strips are going to be limited in their reliability.
So I will once again emphasize that you need to speak with your baby’s care team about the best and safest way to ensure proper tube placement. And now I will continue on with how to check placement in the manner I have learned to do it.
By the way, if checking tube placement sounds too hard to do while holding the tube at the correct spot on your baby’s cheek, you can tape the tube first before you check placement. You will simply have to use an adhesive remover and replace the tape if you need to adjust the tube.
If you get snapback on the syringe while checking placement, do not panic. I cannot count how many times I have gotten nothing but snapback when placing or checking placement on my baby’s NG tube. This especially happened when my baby hadn’t eaten recently and didn’t have anything in her tummy. The tube tends to stick to the wall of the stomach sometimes in those empty little bellies (another barrier to using PH strips).
If you are nursing your baby or if he takes a bottle, leave the tube in and tape it in place. Try nursing him for a few minutes or giving him an ounce or two from a bottle to get something in his belly and then try checking placement again. DO NOT put anything through the tube until you have confirmed correct placement!
If you still cannot get anything except snapback, you may have to try pulling the tube out a little bit and checking placement again. If the problem persists, try pushing the tube in a little farther and checking placement again.
If you are still having trouble, you need to pull the tube out and recheck your measurement. After remeasuring, insert the tube again and check placement again. If you cannot resolve this problem, you may have to go to the ER to have the tube placement checked with an x-ray.
9. Tape the Tube
Once you have confirmed correct placement of the baby NG tube, you need to tape it to your baby’s cheek (if you haven’t already). Put the first piece of tape close to the nose, leaving as little room as possible for little fingers to snag on the tube. Layer the second piece of tape to cover the rest of the tube along the cheek going back toward the ear.
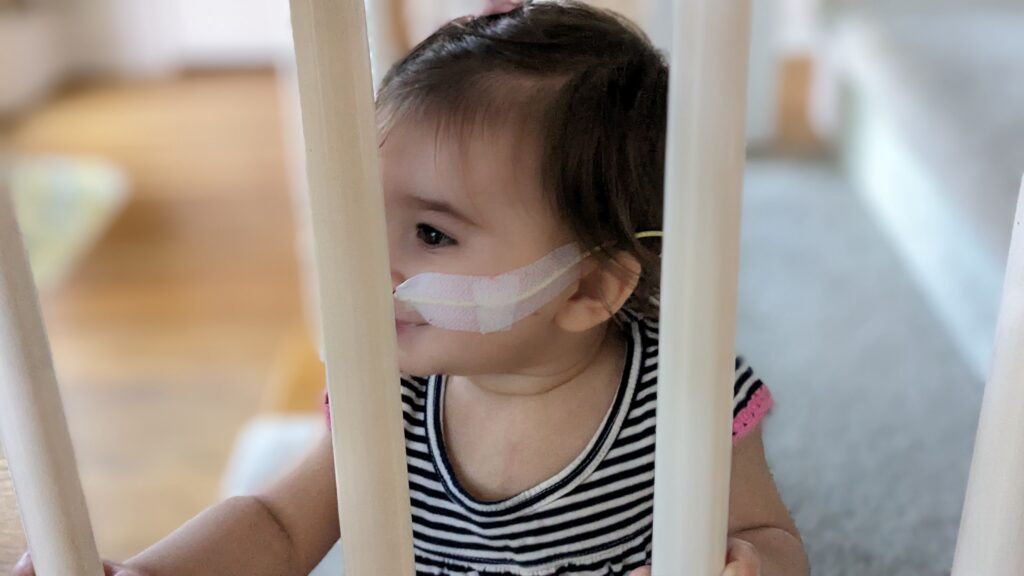
Whenever I change my daughter’s tube, I switch to the other nostril. Her cardiologist advised me that staying on the same side all the time can cause irritation in the nasal passage after a time.
Also, when I am changing just her tape without doing a tube change, I try to tape the tube to a slightly different spot on her cheek so that the tube is not always pressing along the same path on her cheek.
10. Comfort Your Baby
Now, finally, after you have successfully inserted a baby NG tube, confirmed correct placement and taped the tube to her cheek, you can unswaddle and comfort your baby. Get her calmed down and happy before taping the tube to her back if you plan to do so.
Read what it’s like on the other side of baby’s VSD repair.
It is very likely that your baby’s nose is a little uncomfortable, itchy or irritated from having the tube inserted. She may be rubbing at her nose and sneezing for a half or or so after placing a new tube. This is especially true if you have switched nostrils.
11. Tape the Tube to Baby’s Back
Once baby is calm and happy again, grab your slightly wider piece of tape and secure his tube to his upper back for extra security and safety. Make sure you leave enough slack that the tube will not be pulling at your baby’s cheek when he turns his head the opposite direction of the tube.
The best way to gage the appropriate length of slack on the tube is to try to get your baby to turn his face to look at you in the opposite direction of his tube. While his head is turned, pin the tube to his upper back with your finger and then tape it down.
Congratulations, Mama! You have just successfully placed a baby NG tube on your child.
Life with an NG Tube Baby
You know what, Mama? Even if you do not replace your baby’s NG tube yourself, you are just as amazing. You are still doing the hard job of getting your baby healthier by living with and using this tube to feed him every day.
I know you have had to make sacrifices in order to get your baby the nutrition he needs. You have had to sacrifice your sleep, your time and energy, your vision of how he would be fed. You may have had to sacrifice the breastfeeding experience you wanted to have with him or at least part of it. Or maybe you have had to sacrifice the ability to hand him to someone else to feed him a bottle.
Outings are even harder than they used to be with a baby. the vomiting, spitting up and reflux are worse than they are with a typical baby. And there are a whole host of anticipated challenges you don’t quite know how you will handle in every day life with an NG tube baby.
But from one NG tube baby mama to another, just take this one step at a time. You will figure it out as you go. You will learn and this will become normal.
Before you know it, you will be rocking the tubie mama lifestyle. You will be decked out with a feed pump backpack and a diaper bag full of medical tape and adhesive removers. You will be starting feeds and giving meds through the tube in the middle of conversations over coffee in public.
You will learn, day by day. I know you can do this.
If you found this post helpful, please share it so other tubie mamas can benefit from it. And I would love to hear your experience with learning how to place a baby NG tube in the comments below!








Leave a Reply