
Do you smell that? Take a deep breath … It’s the smell of fall. Beautiful, isn’t it? Do you know what that means, Mama? It means it’s time to carve a pumpkin with your toddler!
My husband can attest to the fact that my joy hikes up several notches around this time of year (to reach a climactic finish at Christmas, of course).
But this year, I am extra enthused because I get to carve a pumpkin with my toddler. I am so excited to do all sorts of fun fall activities with my daughter to create those magical memories I still cherish from my childhood.
I have been waiting for this moment for two years.
Read “15 At-Home Activities for Toddlers“.
Two years ago, I was talking to my pregnant belly about all the beautiful and fun things I love about the fall season. I was preparing my unborn baby for all the fun activities we would be doing together in the fall in subsequent years.
Unfortunately, last year, my daughter was only seven months old. At that point, my ability to accomplish anything was still severely hindered by her reflux which required lots of mommy comfort and nursing sessions.
This combined with the fact that she got her first cold right before Halloween meant that we really didn’t do much to celebrate the season.
I am determined that this year, the fall festivities will be a success. And the first thing on my agenda (besides the mother-daughter fall baking that had already begun) was to carve a pumpkin with my sweet girl.
If you are trying to figure out how to carve a pumpkin with your toddler, you have come to the right place. I had this very question in mind as my daughter picked out her pumpkin at the grocery store a couple of days ago.
So I started searching around and learned that there are many ways to carve a pumpkin with your toddler and have lots of fun doing it!
Hey Mama, if you find my blog posts helpful, would you help support this blog by making product purchases through the links on this page? It will not cost you any extra but the commissions I receive as an Amazon and brand affiliate help to cover the costs of operating this blog so that I can keep it running ad-free. Thank you so much for your support. You are literally the reason this blog was started and the fuel that motivates me to keep it going!
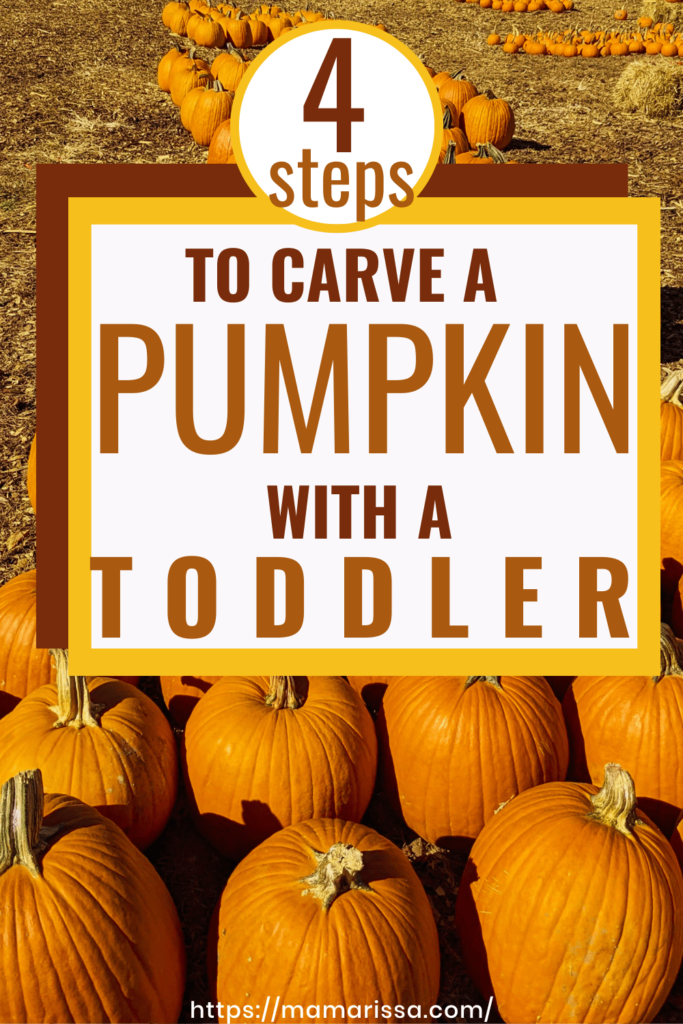
How to Carve a Pumpkin with Your Toddler
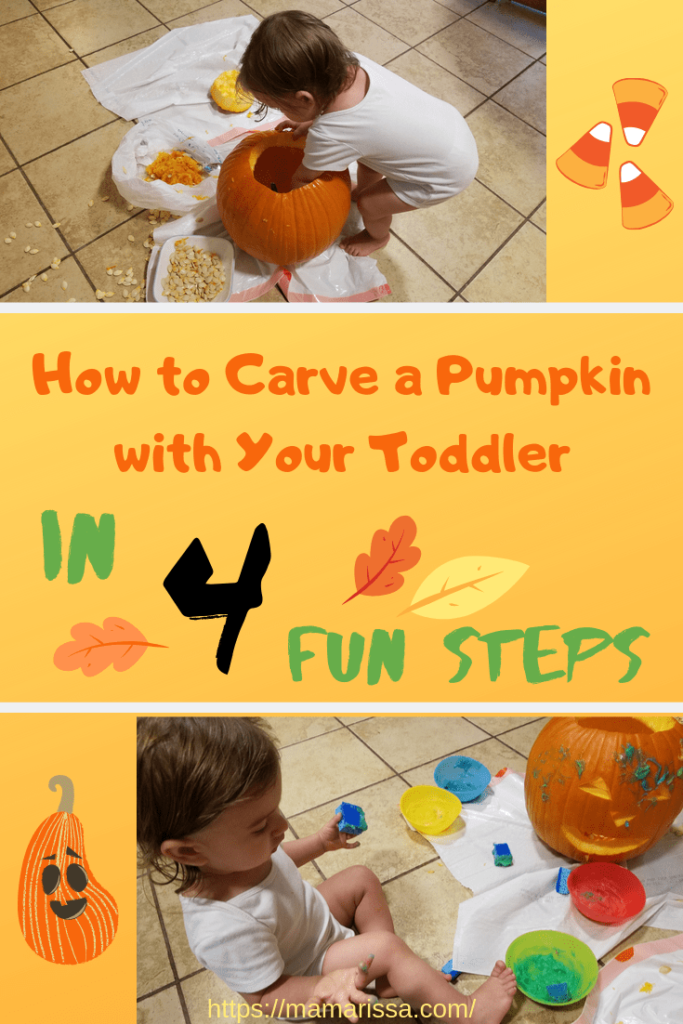
Step # 1: Dissecting the Pumpkin
First of all, you will obviously be doing all of the knife work, Mama. But don’t think that means your child can’t participate or have fun! You will see that there is plenty of fun to be had for mama and child when you carve a pumpkin with your toddler.
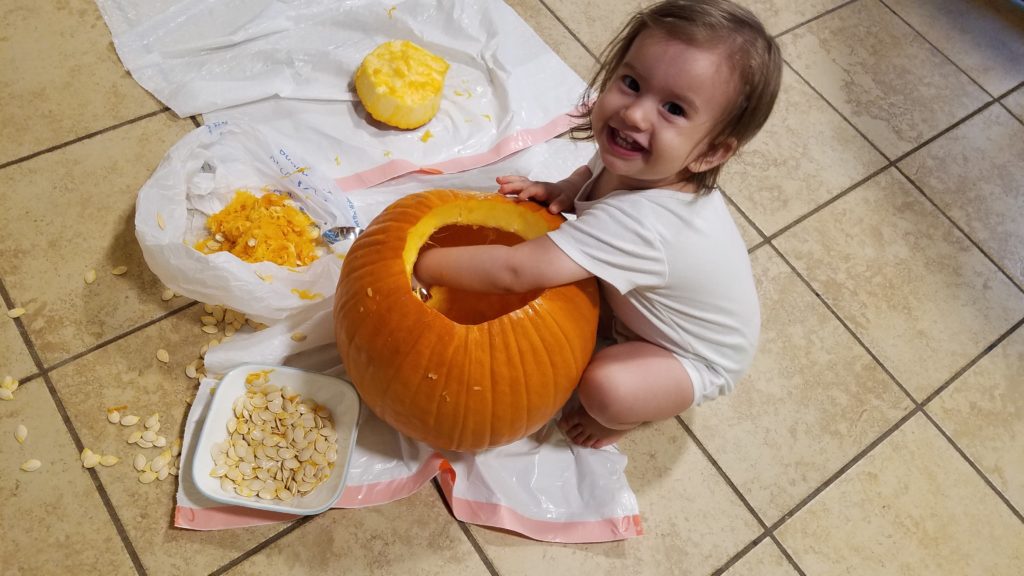
So with that being said, rinse or wipe down your child’s pumpkin and cut the top off for him just as you would any other time you would carve a pumpkin.
Make sure you are on an easily cleanable floor, put some trash bags under the pumpkin and your toddler, and let him have fun exploring the textures of the pumpkin’s goopy guts.
Read “Why You Should Dress Your Toddler Girl Modestly“.
In the meantime, you can be picking pumpkin seeds out of the goop and setting them aside in a bowl to bake later.
Depending on your child’s developmental level, you could have him help you pick out the seeds and practice counting as you drop them in the bowl.
You might be surprised at how well those little fingers can pick out the pumpkin seeds. My daughter almost seemed to be better than me at picking the seeds out, and she enjoyed doing it.
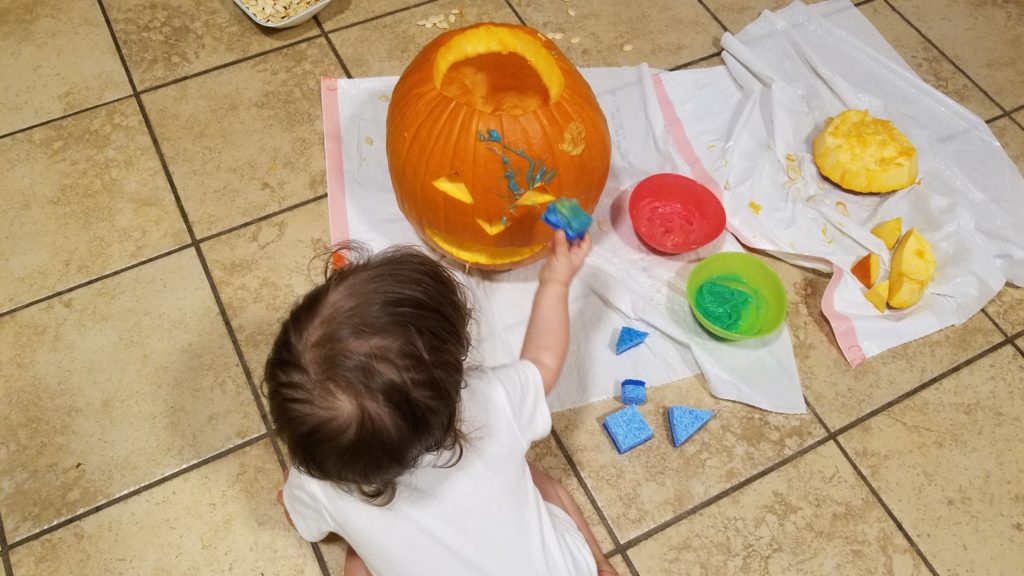
Step 2: Carving the Pumpkin
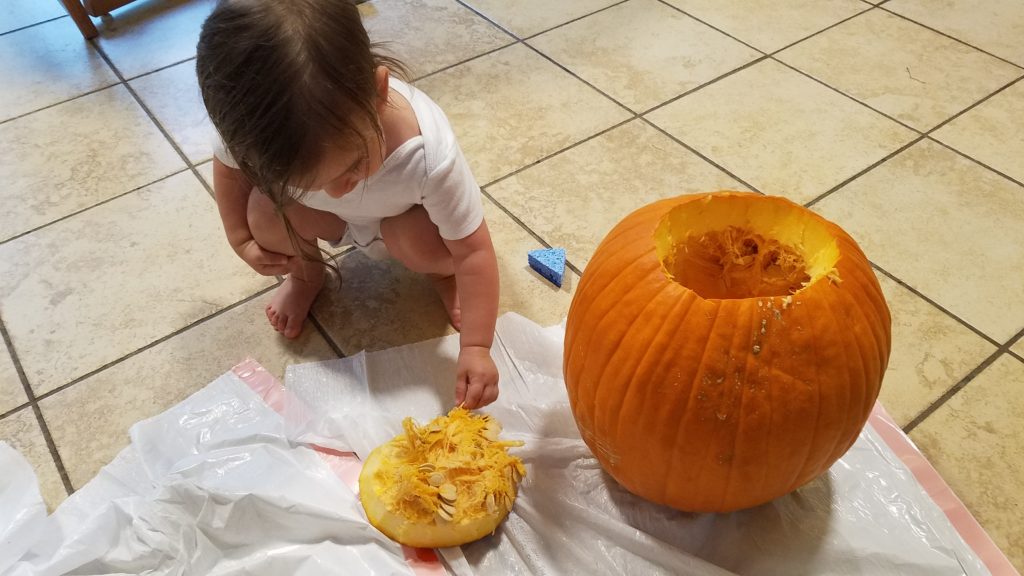
Once your toddler is bored with the pumpkin guts, it’s time to move on to decorating the outside.
If you want to actually carve a design into the pumpkin, now is the time to do it. Your child obviously cannot participate in the carving itself.
However, you can cut shapes out of the pumpkin and have your toddler fit the shapes back in the openings like a puzzle. My daughter enjoyed putting the eye, nose and mouth cut-outs back into the pumpkin for a few minutes before she was ready for a new distraction.
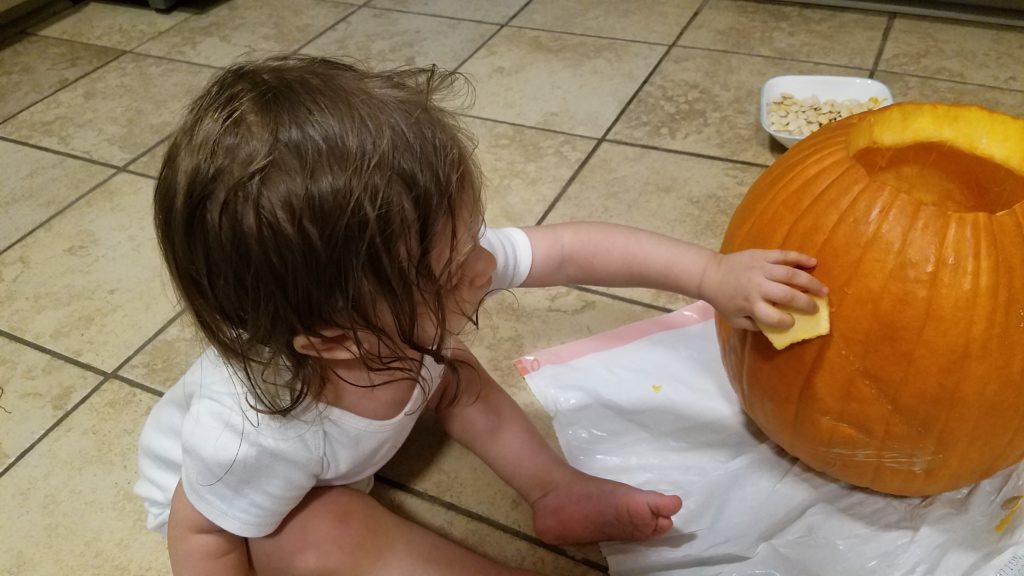
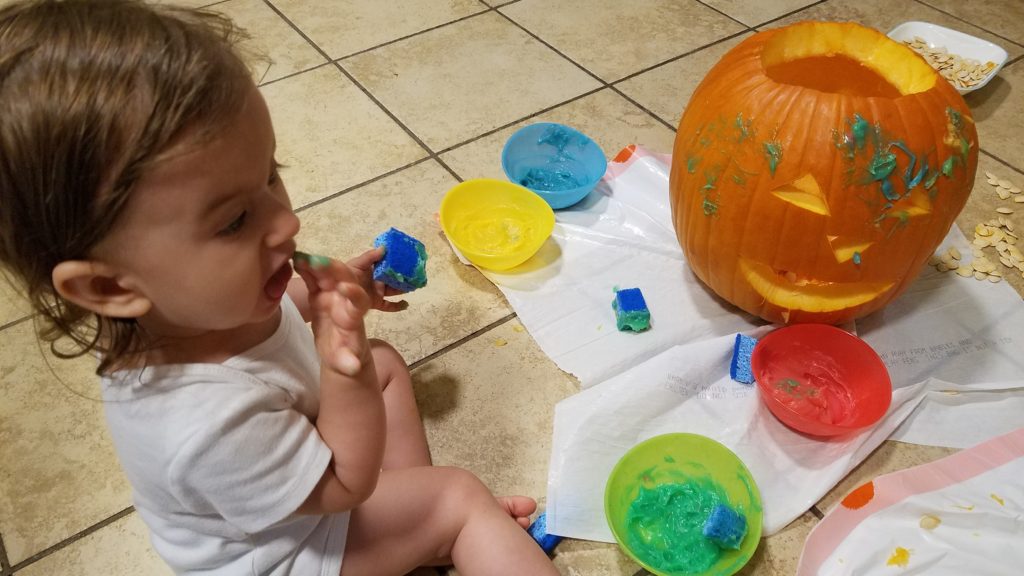
Step 3: Painting the Pumpkin
Now that you are done using a knife, your toddler can officially take over the pumpkin decorating. It’s time to get messy again – this time with paint!
Since toddlers are notorious for putting things in their mouths that they shouldn’t, I recommend using a homemade non-toxic paint. It is easy to make and requires only flour, water and food coloring.
There are numerous recipes out there, but I used this one from Tinker Lab. I’m glad I did, because my curious toddler did indeed taste the paint several times.
You will want to prepare the paint ahead of time so that you can quickly move onto decorating before your toddler looses interest.
Or, if you are planning ahead and don’t want to mess with making your own paint you can purchase vegetable powder finger paints on Amazon that are safe for toddlers.
Once you are ready for the painting phase, give your toddler a paint brush, shaped sponges, or just let her use her little fingers and see what she creates.
Read “Healthy Candy for Kids with Tooth Decay“.
I simply cut squares, triangles and circles out of one of my unused kitchen sponges. Honestly, playing with those shaped sponges before we even started working on the pumpkin was one of my daughter’s favorite parts.
She also thoroughly enjoyed playing with the sponges in the paint. Although she was more interested in the paint itself, she did also do pretty well applying it to the pumpkin with the sponges.
As long as she was having fun, my goal was accomplished.
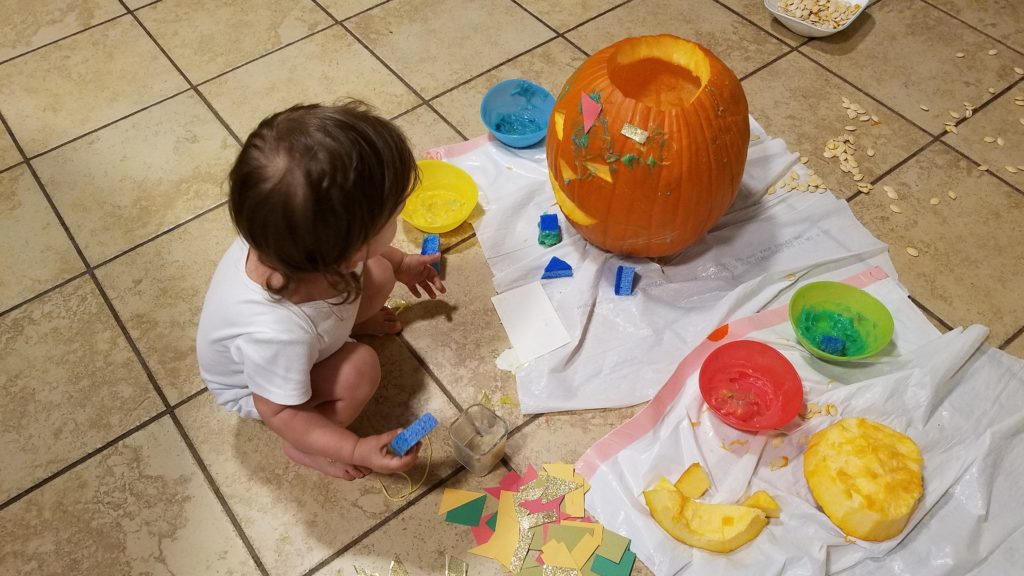
Step 4: Adding Crafty Touches to the Pumpkin
While your toddler is getting acquainted with the paints, you can break out the other fun decorations.
The fun part about this step is that it allows both you and your child to get creative. Your decorations can be as simple as Halloween stickers off of Amazon or as unique as using “nature treasures” to create a pumpkin masterpiece.
Unfortunately, it was raining when I was carving a pumpkin with my toddler, so we could not collect my daughter’s favorite nature treasures to decorate her pumpkin.
However, I managed to find some basic crafty items and fall stickers in my closet which gave her some diverse decorative options.
To apply these crafty items, you can once again make a non-toxic glue from scratch for your toddler to safely use.
Read “Life With a Clingy Toddler“.
Although there are recipes for glue, many of them are very similar to the paint recipe, so I simply set aside some of my cooked water and flour mixture before the thinning process. This worked very well as our glue.
Once again, I recommend having the glue ready to use before starting to carve your pumpkin with your toddler. Or, you could probably just use some of that vegetable powder finger paint with a little less water mixed in for your glue as well.
Once your toddler is interested in adding a new dimension of decoration, let him glue pieces of paper, string, ribbon, etc. on his pumpkin to his heart’s content.
Read “
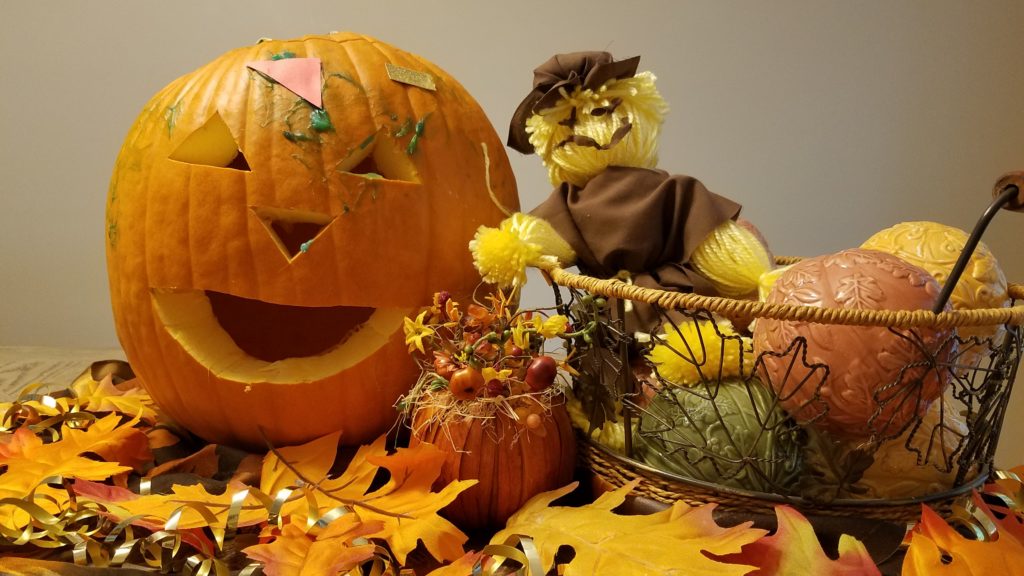
Once he’s done, put the pumpkin somewhere out of reach to let the paint and glue dry for 24 hours.

After drying, your toddler’s pumpkin is ready to become a part of the festive fall atmosphere on your front porch!
Why it’s Worth it to Carve a Pumpkin with Your Toddler
I’m sure you can already picture the uncooperative behavior that is inevitable when you carve a pumpkin with your toddler.
She will shove raw pumpkin seeds and guts in her mouth. She won’t be interested in putting the paint and stickers on the pumpkin.
He’ll want to eat the glue. He will get distracted by the garbage bags that have nothing to do with carving or decorating the pumpkin.
You may be wondering what the point is or if it’s worth it to even try to carve a pumpkin with your toddler. Well, that really is up to you to decide, Mama.
For me, it’s about starting fun traditions that will bring joy to my daughter’s heart and cause her to look forward to certain events because she knows she will get to do something fun with people she loves.
Right now, she may not be able to carve a pumpkin in the traditional sense or comprehend the importance of pumpkin-spiced beverages and baked goods that make the season so exciting.
But she did get to do some fun and interesting things that we don’t do on an average day. And ultimately, isn’t that exactly what we love about traditions?
I’ll admit, part of what makes it worth the hassle for me is the fact that I want to carve a pumpkin, and it’s more magical to do it vicariously through my daughter’s eyes.
What kind of fall traditions are you doing with your toddler this year, Mama? Tell me about them in the comments! And if this post helped you know how to carve a pumpkin with your toddler, please share it via the social share buttons below!


Leave a Reply